Friday, October 29, 2010

Transition from Halloween to Thanksgiving Decor - By Stacy


 Halloween is my least favorite Holiday. I am not one for all the gore. But I have 4 boys. So to humor them I do put out some Frankensteins, skeletons, spiders, bats and things like that. The majority of what I decorate with is pumpkins and fall leaves. It goes up for Halloween and can stay up for Thanksgiving. Here are some of the pumpkins that I have. There is a tutorial for this Toilet Paper Pumpkin on my blog. Yep. There's toilet paper inside! It is EASY. And there is no sewing involved which makes me happy :)


 These Paper Mache Pumpkins were a fun family project. You can read more about them HERE.


I "scratch" pumpkins with words and pictures when they start to turn orange in my garden. They naturally scar over and it looks really neat. You can see more examples HERE.

Happy Fall!!!

Stacy is a contributing writer and part of the team here at Tools Are For Women Too.  If you would like to be a team member as well, you can email Rory for details at....

Thursday, October 28, 2010

The Halloween And Other Fun Stuff Link Party

Okay!, Let's see em!  This is the last link party before Halloween, so let us in on what you are doing to have fun this week. We all want a look at your costumes, jack-o-lanterns, recipes, and anything else you want to share.  Hmmm...Any pet Halloween costumes this year?

If you don't have a Halloween item to share, no worries.  This party is open to everyone, as usual.  You can post your blog button, Etsy Store Item, tutorial, or even a pic of your smiling face.  Practically no rules.  Just have fun and link like the wild party animals that I know you all are.


Would you like to give your blog a little push?  Just email me for ad rates and details.

Sunday, October 24, 2010

The 50 Something Link Party!

Tools Are For Women Too has now thrown over 50 link parties and I would like to thank everyone who has been a part of them.  One of the parties reached 700+ thumbnails and it has been a pleasure for me to put them together for all of you.  Please help me celebrate reaching the 50 party mark by inviting your friends and readers to participate.  I would love to have them.

Here are the rules for this week's party....

1.)  The more the merrier.  Everyone is welcome, including online sellers.

2.)  Post as many items as you want.  No limit.  Variety is the spice of life.  Post buttons, projects, tutorial links, whatever you want.  It's all good.

3.)  Please become a follower if you aren't one already.

4.)  Do me a favor if you can and link back to the party somehow.  Any way you do it is fine.  Not picky here.  Grab a button, mention the party in a post, start a forum thread,  or thrill your neighbors by knocking on their door tonight and letting them know about it. 

5.)  Have fun.  It's a rule.

Don't forget about The Pink Hardhat Forum.  It's free to join.  Questions?  Just email me.

Friday, October 22, 2010

How To Refinish Furniture - The Desk Project by Stacy

Hi! Its me Stacy from Not JUST A Housewife! I love building and refinishing furniture! It all started when I was a newly wed and received a ton of hand-me-down furniture from family and friends. Most people probably would have left it "as is" until they could afford new things. But not me. I wanted them to look nice and match right then ( I don't have a whole lot of patience). So I figured out how to fix them up. I still have almost all of that furniture and some are my favorite pieces even though I have lots of new things too.
Today I am going to show you how I refinished an old desk that has been collecting dust in my mom's barn for years! The first picture is the before before.


And here it is all cleaned up. The before picture :)


 It needed a lot of TLC. It had a minor crack on the top, thumb tack holes along the front, and chunks missing. It also had a broken leg. I first addressed any repairs that needed to be made. I used Elmers stainable, paintable and sandable wood glue. I put glue along the crack and let it sink in. Then I wiped it off with a damp paper towel.

Putting the large clamp on caused some of the glue to squeeze out so I wiped it again. I glued and clamped the broken leg too. I used a small C clamp.
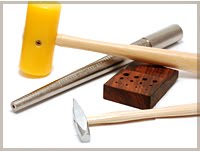
The desk wasn't the best ever made. The drawers were held together with only 2 nails on each side. Needless to say, they weren't very strong. I re-enforced them with my brad nail gun. I looked around the desk and found some other spots to re-enforce as well. Really I just like to find reasons to use it. It is my favorite tool!


 I let the glue dry for a day before I took the clamps off and sanded it. I was lucky because it was pretty much all flat. I did most of the sanding with my hand sander. There were only a few spots I did by hand. You need to remove the old finish so the wood will accept the new stain. If you have something that you want to refinish and it would be hard to sand, you can use gel stain. I have used that several times with very good results. I use Minwax's gel stain. You can apply it over existing finishes. It is thick and sticky. It would be best to practice on something else first to get the hang of it. For an example, see my bathroom HERE.


 It is all naked and ready for a new look! I almost forgot to mention that I used putty to fill in any small cracks or nail holes. Putty, let dry, and then sand. I use Elmers stainable, paintable, sandable wood putty. I used the natural color because it was outside and so was I. I should have used the darker colored putty (it was ALL the way inside ). This putty is stainable, but to a point. That is why they have a darker color. I added more stain to the puttied parts and it worked out fine, but in retrospect I should have got off my big behind and got the darker putty!


In a situation like this, I use oil based stains. This wood was old and dried out. The oil in the stain helps the wood. Plus it dries slower than waterbased stains and gives you more time to work at getting an even finish. Waterbased stains sink in fast, especially with dry or porous (soft) wood. You can also use a wood conditioner before applying the stain. It is sold in cans just like the stain and is milky white. I always use foam brushes too. There aren't any brush marks and it makes for easy clean up. Just toss them in the garbage!


 I let the stain dry for a day and a half. It needs to be completely dry and not sticky at all.


Then you can add the polyurethane. I love the smell of polyurethane! I know, I know, in the state of California it is known to cause cancer yadda yadda. . . But I love it. In a well ventilated area of course. It brings the wood to life and protects it. I use Minwax's Fast Drying Clear Satin finsih.
And drum roll please. . . . . .


Taaadaaaa! Isn't she a beaut??? All I did for the drawer pulls was scrub them in some soapy water. I love the patina on them. I think this will make a welcome addition to my office.


Stacy is one of the talented contributing authors here at Tools Are For Women Too.  If you would also like to be a part of the "Tools" team, email us for details at

Wednesday, October 20, 2010

Welcome To Another Hardly Any Rules Link Party

I don't know about everyone else, but I am sure liking this "no rules" party format lately.  Not all of us have the same needs out there and I love the way it has opened things up for all of us. 

Here are the almost no party rules....

1).  Please become a follower if you aren't one already.  I won't send out a warrant for your arrest if you don't, but it would be nice. 

2.)  Post as many items as you want.  There are no limits.  Take advantage of it and link like crazy.

3.)  Post pretty much anything you want.  Buttons, your latest Halloween project, tutorials, Etsy Store items, and pictures of your smiling faces, are all welcome.  Post according to what you think will benefit your blog or store and what your needs are. 

4.)  Please link back to the party somehow so that others will know about it.  Grab my button, write a post, start a thread, or bring it up while car pooling when you have a captive audience.  Be sure to turn the radio down in order to get everyone's complete attention.  Whatever you do to help out is fine.

5.)  Have an immense amount of fun.  It's a rule.

Would you like to jump-start your new blog or online store?  Feel free to mail me for inexpensive ad rates and details.

Build the Best Wirework Toolbox


After you have begun wireworking you will eventually realize that it will be advantageous to put together a toolbox specifically for your wirework. If you have been following along with my past few tutorials I have already detailed some of the tools needed for this particular craft. Many of the designs on my etsy site, Sunset & Vine, are made with the use of my wirework toolbox and going forward in the future with my tutorials it will benefit you if you have a toolbox of your own or are at least familiar with the tools used.


To build a great toolbox for wirework you will need the following:
  • Anvil or bench block, I prefer to work with a bench block, great for hammering.
  • Cutters, flush, side or end.
  • Hammers, Chasing, Ball peen, currently I use a chasing hammer and a household hammer.
  • Rawhide Mallet, great for strengthening wire and soft shaping.
  • Mandrels or dowels, I use caps,lids, bottles, really anything that has the shape I need.
  • Needle files, cup burr, critical for smoothing rough edges.
  • Pliers, chainnose, roundnose.
  • Sandpaper
  • Polishing Cloth
  • Liver of Sulfur, which is another thing entirely that I will go into in another tutorial.


Once you have the built the best toolbox based on your needs you will be able to do almost any tutorial involving wirework. I know this is a short and simple post but I think it is great to know the building blocks for the work we will be doing together in the future. If anyone has any questions or would like to request a particular tutorial please contact me by email-sunsetandvine@live.com.


Are you interested in becoming a part of the "Tools Team" and being a regular contributing writer?  Just email Rory for details.

Sunday, October 17, 2010

The No Real Rules Link Party

Welcome to the party!  And what fun is a party with a bunch of rules anyway?  Post as many items as you want.  Everyone is welcome.  Feel free to post buttons, store items, pictures of the goofy kid down the street, or whatever you want.  Just have fun with it and link like crazy! 


Would you like a feature post written about your great site or online store?  Just email me for rates and details.

Friday, October 15, 2010

How To Make A Button Frame - A Tutorial By Stacy


 I LOVE buttons. When I was little my mom had an old cigar box filled with buttons, many of them antique. I use to play with them for hours. I would sort them, pick out my favorites, and learn to sew with them. So now I have my own collection of buttons in a jar that my kids play with. I am always thinking of new ways to use my buttons. I decided to make a button frame.

 You will need a flat frame, buttons, glue, your choice of paint or stain, and a foam brush. I bought my frame at a craft store for $1.00. You can buy an already finished frame but make sure it is flat.

 I stained mine and then let it dry completely. I like water based stains for projects like this. They dry quickly and are easy to clean up.

Next pick out the buttons you want to use and play around with the placement until you like the way it looks. I think it would look good to do one in all the same color like all brown buttons or all white.


The last thing is to glue them on. I chose to use a glue gun because it is easy and this frame is for me. If I were to sell this however, I would use a heavy duty epoxy to ensure they were on permanently.
What do you like to do with buttons??? For more project ideas, visit me at my blog Not JUST A Housewife.

Thursday, October 14, 2010

Link Party Time!


Here we go again!  No limits as usual this week.  Post as many projects as you want and link, link, link.  And, do me a favor by trying to link back to the party somehow. 

Here are the not so stringent, pretty relaxed rules...

1.)  Please become a follower if you aren't one already.  It's free and all the really cool people do it.

2.)  Have fun!


Does your blog or online store need a little jump-start?  Email me about advertising rates and details.

Wednesday, October 13, 2010

How To Create Your Own Hoop Earrings - By Brooke Miles


Last week if you stopped by we learned how to make ear wires and this week we are going to build on that idea by creating our very own hoop earrings. In my Etsy store, Sunset & Vine, I have quite a few hoops featured. Hoop earrings are a timeless, classic style and they are also extremely versatile. The other great thing about hoops is that they are inexpensive to construct, they require very few materials, the design options are unlimited and they are easy to create!


The materials you will need to get started are 20 gauge or 22 gauge half-hard wire, beads of your choosing(optional), a cylindrical object (I use different sized prescription bottles), round nose pliers, chain nose pliers, wire cutters or flush cutters, file or cup bur to file the metal. Most of these materials you will already have around the house and they are the same materials needed for last weeks project.


The first step is to take your wire and cylindrical object and wrap the wire around the object. You will want to make sure that you have about a 1 centimeter overlap with your piece of wire and then cut the piece with your wire cutters. Repeat this step so that you have two pieces cut.


The next step is to make a round loop on one side of your hoop shape with your round nose pliers and then slightly bend it back to open up the loop slightly. Repeat this step with your other hoop shape. If you have beads you will want to slide them on the wire now.


Finally, you will take the chain nose pliers and make a slight bend to close the hoop for the closure. Grasp the end of the wire and bend an angle between 45-90 degrees. Take your file and smooth away any sharp edges.


Tips:


  • Use a lighter gauge wire to practice with, try 22gauge, it will still be great to wear and it will be easier to mold and work with.
  • To avoid making mistakes with costly sterling silver or gold fill wire practice with copper wire or colored craft wire.
  • Use a chasing hammer or rawhide mallet to strengthen your hoops by giving them a few light taps.
  • For added texture hammer your hoops.
  • Try different sized bottles and different shapes for a variety of hoops.


Have fun with this and don't stop at just one pair. I made several pairs in different metals, some with beads and some without. I made ovals, circles and squares and I had a lot of fun learning what worked for me in the process. There is nothing better than having a great pair of hoop earrings except making a pair for your best friend or family member. They make a great gift and Christmas is right around the corner!

Brooke